Category Archives: Uncategorized
CINNAMON SUGAR PULL-APART BREAD
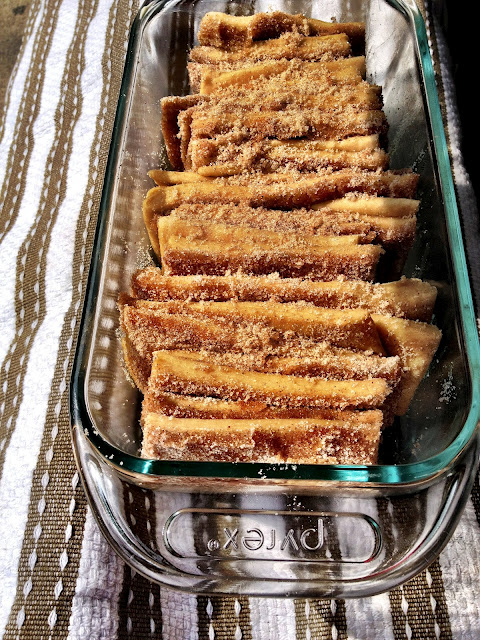
I’d seen this bread in several places and wanted to try it. Not just because it is beautiful, as you fold pieces of cinnamon-sugar-dusted dough together in a loaf, but also because it is bakes up gooey-ly together in a way that even a pan of cinnamon buns can’t. Several words of wisdom regarding this bread: a) make it for friends, because people will ooh and ah over it, and it is nice to make that happen for people you love and b) don’t use a small loaf pan! I did, and as you will see, it overflowed in a very comical fashion (delicious, yet comical).
Once you tackle the method (sounds complicated, but isn’t), you can make many variations on this (like garlic and cheese, or lemon and ginger).
Cinnamon Sugar Pull-Apart Bread
Adapted from Joy The Baker
For the dough:
3 c. flour
2 oz. unsalted butter
1/4 c. sugar
1 envelope active dry yeast
1/2 tsp. salt
1/3 c. milk
1/4 c. water
2 large eggs, room temp.
1 tsp. vanilla
For the filling:
1 c. sugar
2 tsp. cinnamon
1/2 tsp. nutmeg
2 oz. butter, browned
1. Whisk yeast into 3 tablespoons lukewarm water. Add a pinch of sugar and let sit for 5 minutes until it foams and bubbles.
2. In a large mixing bowl, whisk together 2 c. flour, sugar, yeast and salt and set aside.
3. Whisk together eggs in a small bowl.
4. In a saucepan, melt together the milk and butter until butter just melts. Remove from the burner and add water and vanilla. Let it stand for a minute.
5. Pour the milk mixture into the dry ingredients and mix until incorporated. Add the eggs and mix into the batter. This will take a bit! Add the remaining flour and mix into a sticky dough.
6. Place dough in a large greased bowl and cover with a towel. Let it sit in a warm spot until it doubles in size, about 1 hour.
7. Deflate the dough and knead 2 tablespoons flour into it. Let it rest for a few minutes. On a lightly floured work surface, use a rolling pin to roll out the dough into a large rectangle (try and do 12 x 20 inches). Brush the melted butter across the dough and sprinkle with cinnamon sugar.
8. Slice the dough vertically into 6 strips and stack them on top of each other. Then slice in 6 equal slices (you end up with 6 stacks of 6 squares). Layer the squares into the loaf pan. Place a towel over the pan and let it rise for about 30 minutes.
9. Preheat over to 350 and bake the loaf for 30 to 35 minutes. Let it rest for 20 minutes or so before you take it out of the pan, or eat it warm straight from the pan!
COLD SESAME ZUCCHINI NOODLES
A little photo inspiration for summer produce for you! Here is a cold zucchini “pasta” dish tossed with a cold spicy sesame dressing. A delicious and light way to enjoy your green vegetables! See the recipe here at Tasting Table.
BEST COCOA BROWNIES
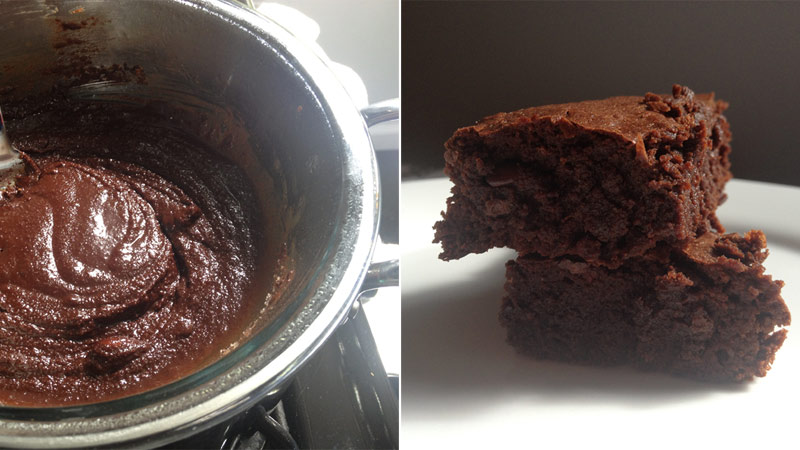
Oh, brownies. So delicious, and so many variations. After a highly unsuccessful attempt at chocolate-based brownies (hello, did you even know you could make bad brownies? They are one of the easiest one-bowl dessert wonders. Well, people ate them anyway. But they were bad. See photo evidence below), I fell back on the tried-and-true cocoa brownie recipe that yields densely fudgy brownies every time. These are rich and chocolately and really incredible when you freeze them.
*the failed brownie recipe came about because I was trying to be frugal and use up some not-so-great milk chocolate in my freezer instead of buying bittersweet baking chocolate. Lessons learned! I threw some chocolate covered mint candies in the batter at the last minute which did redeem them slightly but the texture was off.
Best Cocoa Brownies
Adapted from Smitten Kitchen
10 tablespoons butter
1 ¼ cups sugar
¾ cup cocoa powder
¼ teaspoon salt
½ teaspoon vanilla
2 large eggs, cold
½ cup flour
pinch of espresso powder
Preheat oven to 325ºF. Line the bottom and sides of an 8X8-inch baking pan with foil (I used an 8-inch round pan).
Stir in the vanilla. Add the eggs one at a time, stirring vigorously after each one. When the batter looks thick and shiny, add in the flour all at once. Stir the mixture until you cannot see it any longer, then beat vigorously for 40 strokes with the wooden spoon or rubber spatula. Spread evenly in the lined pan.
Bake until a toothpick plunged In the center emerges slightly moist with batter, 20 to 30 minutes. Freeze, and try not to eat them all one night around midnight. Or give them to friends at an early spring BBQ (my offering).
CHOCOLATE OLIVE OIL COOKIES
If you run out of eggs, and have no butter, but do find yourself with a serious chocolate craving, you can make these! The olive oil makes a brownie-like batter. Scoop the dough with a spoon into rounds and sprinkle with coarse sea salt. The result? Fudgy, salty-sweet, soft chocolate cookies.
CHOCOLATE OLIVE OIL COOKIES WITH SEA SALT
Adapted from Take a Megabite
3/4 c. flour
1/3 c. cocoa (use Valrhona dark if you want to get serious)
1/4 tsp. baking soda
1/4 tsp. salt
1/2 c. sugar
2 1/2 T. olive oil
1/2 tsp. vanilla
1/4 c. hot water, plus 2 T.
Preheat oven to 350 degrees. Whisk together flour, cocoa, baking soda, salt and sugar in a medium bowl. Add oil, water and vanilla. Beat until the batter is stiff (it will have a brownie batter-like consistency).
Drop heaping spoonfuls of the batter on a parchment-lined baking sheet. Sprinkle with coarse or flaked sea salt. Bake for 8-10 minutes. Let cool.


